Flower Costumes: Make a Simple Hollyhock, Larkspur, or Gladiolus Costume

Simple, Easy-to-Follow Directions for a Cute Flower Costume!
Putting on the play Alice in Wonderland requires a lot of flower costumes! As the costume mistress in charge of the flowers, I had to come up with six flower headpieces that were different, quick and easy to make, inexpensive, and sturdy enough to handle several productions by our homeschool theater group. I didn't want to simply make petals around the face in different colors, but rather recognizably different flowers. This particular tall flower headpiece could work as a larkspur, foxglove, gladiolus, hollyhock, or other tall stem with multiple flowers, but it is quite simple to make!
Tall Flower Costume - Basic Shape - A craft foam base is easy to attach petals to.
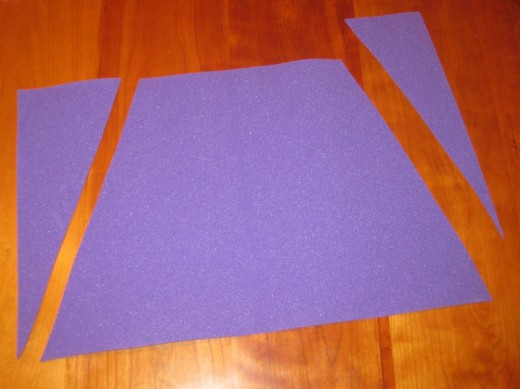
You need to create a cone shape, tapered toward the top, to mimic the way the tall flowers get smaller toward the top. Using a piece of craft foam (standard size, 9x12), cut off a roughly equal angle on the two short sides. This is the base color of your flower and will show through, so match the craft foam to the petal color.
Hollyhocks by BradHaynes
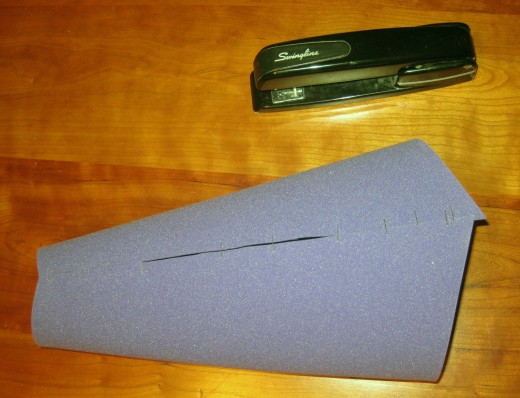
Form the craft foam into a cone shape and staple the edges securely together. You can run a bead of hot glue down the seam to further secure it. Trim the bottom edge slightly to even up the edges, but leave it longer on one side (the back) than the other.
Blue Dwarf Larkspur by HortusFloridus
Tall Flower Costume - Petals

Fabric flower petals to decorate the craft foam base come next. These generally come 300 petals to a box, which will be far more than you'll need for a single flower. Save the rest for another craft, or make more flower headpieces! These come in red, white, and pastel colors such as pink, lavender, and sage green.
Fabric Flower Petals - Fabric Rose Petals in multiple colors
Fabric flower petals come in many colors and are a perfect size and shape for creating the blossoms on our tall flowers. Choose a petal color to match the base color of the craft foam.


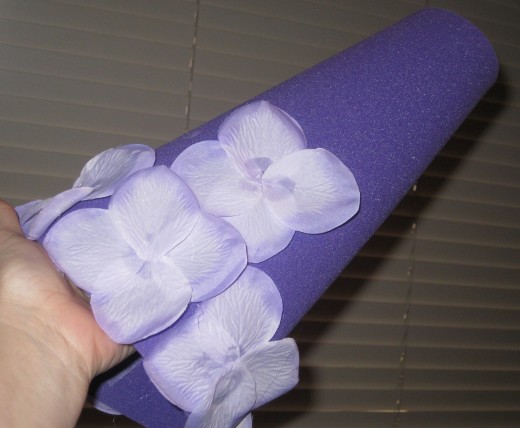
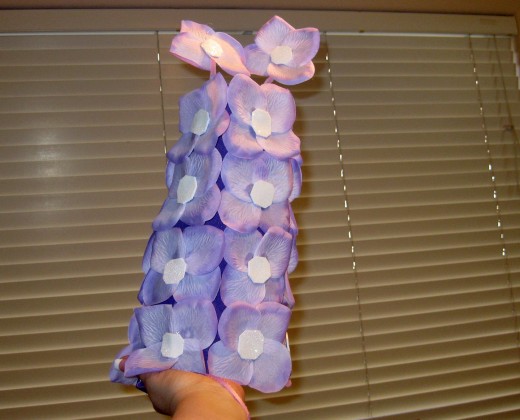
Flower Petals in Rows
One way to attach the petals is in rows, individually. It is easy to staple them, IF you have a long-arm stapler than can reach to the center of your flower cone! I did try using packing tape to hold the petals in place and it did not work very well. If you do not have a long-arm stapler, it is very easy to use needle and thread to quickly tack the petals in place. The foam is very easy to sew into.
The petals in rows like this gives very good coverage and looks quite pretty. However, it was not the look I wanted, so I unstapled the petals and tried a slightly different pattern for attaching the petals.
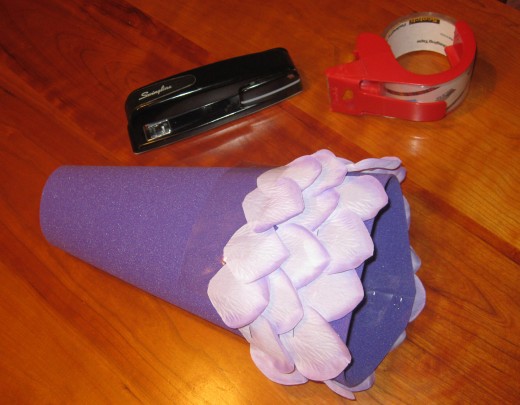
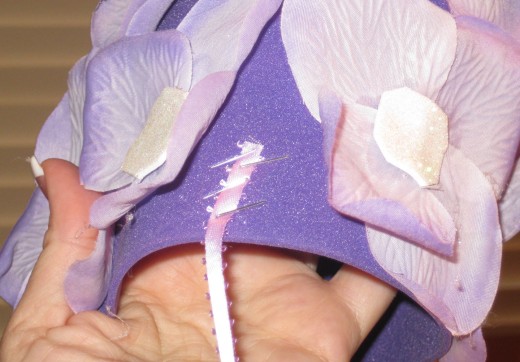
Flower Petals Attached as Individual Blossoms
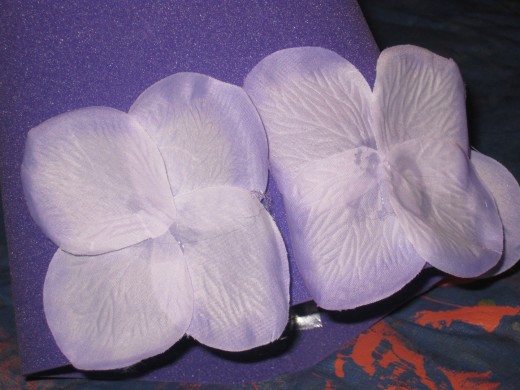
Here I attached four petals in a circle to form a blossom. I attached each petal separately with a hot glue gun. The four petals should overlap each other quite a bit in the center, to make them look like a single blossom.
Also make sure that each "blossom" of four petals overlaps the edge of the blossom next to it slightly, so that the base of craft foam does not show through too much.
Red, Orange, and Scarlet Gladiolus by BeautifulClicks
Surebonder Mini Glue Gun - Handy mini glue gun is perfect for small craft projects!

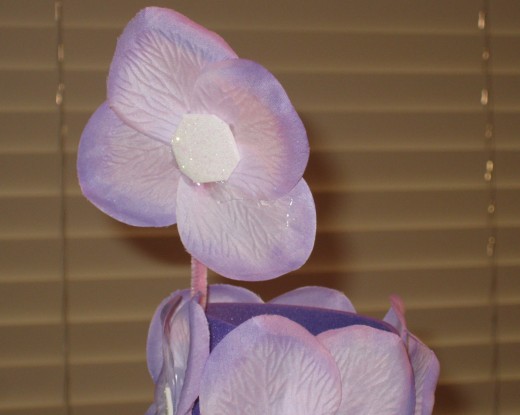
Tall Flower Costume - Flower Centers
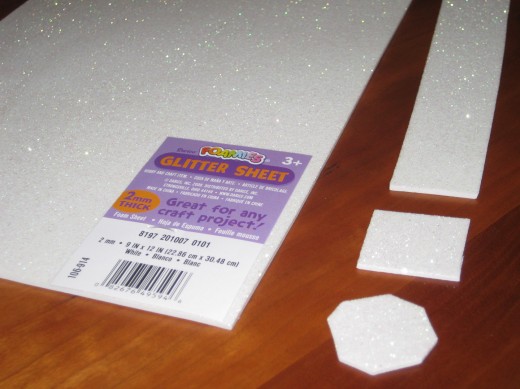
I found a silvery glitter craft foam that works perfectly for the center of the flower blossoms! Just enough glitter to give it the look of some texture and a little shine too. I cut inch-wide strips from the foam, then cut the strips into inch-wide squares. I then snipped off the corners to give an octagon shape. Can you tell, I didn't want to spend time trying to cut circles? I did try my extra-large hole punch, but the foam was too thick. I actually like that the shapes are all slightly different since flowers are not "perfect" with every piece exactly the same.
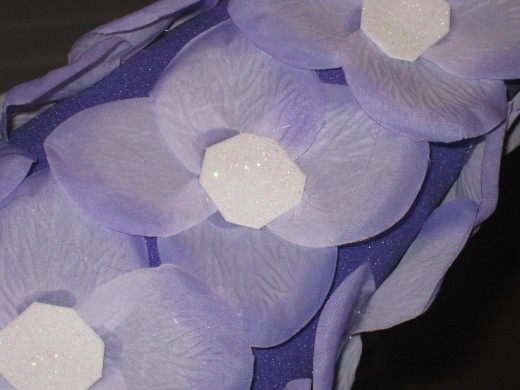
Once again, I used hot glue to attach a center to each blossom. The result was even better than I hoped!
Glitter Craft Foam

Tall Flower Costume - Finishing the Top
The crown of the flower needed something extra. The tips of hollyhocks and gladiolus and larkspur are all more wispy and tapered than the rest of the flower stem. So I hot glued a blossom directly to the end of a chenille stem (pipe cleaner) and stapled it in place, with just a bit of the stem showing.

When stapling the chenille stem into place, use at least three staples in a row so that the stem will not twist out of place. Also, be sure the solid side of the staple is on the inside, holding the stem in place. If you put the folded side of the staple on the inside, the stem might pop out of the staple.
I added two stems to protrude at the top, for two blossoms that will bob independently above the rest of the flower. Three would work as well, with one sitting higher than the other two, but more than that would be crowded and risk weighting the top too much.
Foxglove by MaryVandenberg
Tall Flower Headpiece - Fastenings
I stapled ribbon to each side, to fasten under the chin. This is not adequate! The flower wobbles and falls off. I'll be tweaking this and update as soon as I decide exactly what to do to anchor it properly.
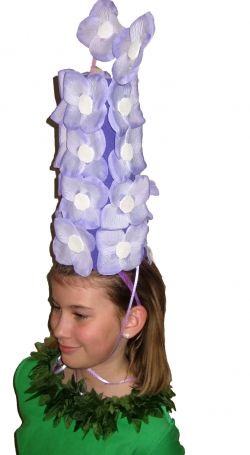
Completed Tall Flower Costume Headpiece - Your hollyhock, larkspur, gladiolus, or foxglove flower costume is done!
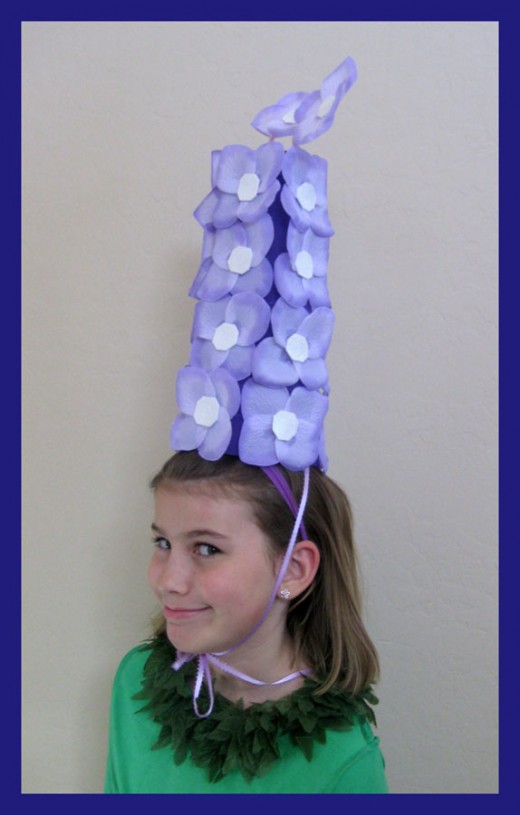
Green Leaf Leis - I took apart green leaf leis and sewed the leaves individually around the collar of a green shirt for the "stem" of the flower costume.


